The Rich Text Editor allows changing table properties after the table has been created. To change table properties of a new or existing table, right-click the table and select the “Set Table Properties” option from the context menu which will appear (see the screenshot below).

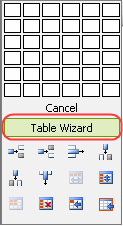
Alternatively, you may select the “Set Table Properties” button ![]() available on the “Table Builder” dialog.
available on the “Table Builder” dialog.
Yet another way of setting table properties is selecting the “Table Wizard” button from the “Table Builder” dialog.

When selected, the “Set Table Properties” option will open the “Table Wizard” dialog, which allows you to change table design, set table and cell properties, or adjust accessibility according to your needs.
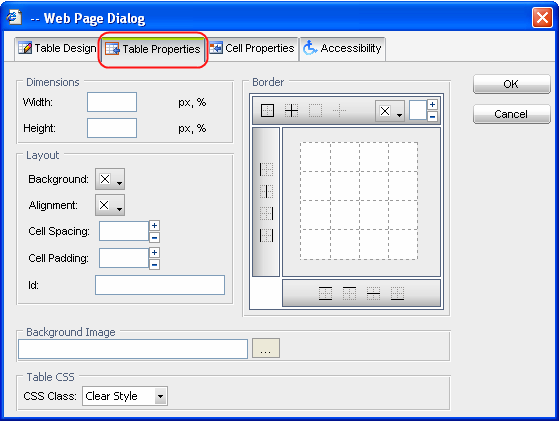
Select the “Table Properties” tab to set or change table properties (see the screenshot below).

The “Table Properties” tab allows you to set the appearance of the table. The table properties are explained below:
- Width – Use to set the width of the table in pixels or percent.
- Height – Use to set the height of the table in pixels or percent.
- Background – Use to set the background colour of the table.
- Alignment – Use to align the table to the left, center or right side of the page.
- Cell Spacing – Use to set the space between the borders of a cell.
- Cell Padding – Use to set the space between the content and the border of a cell.
- ID – Use to set an ID for a table, which will give you some options for advanced table handling.
- Background Image – Use to set an image as the table background.
- CSS Class – Use to set the table CSS class and style.
- Border – Use to set the border width, color, and layout.